DISCLOSURE:

Several affiliate links are used in my posts. This means that, if you click on one of my links and make a purchase from that company, I will receive a small percentage of the sale without any additional charge. I appreciate your support greatly.

Saturday, November 30, 2024

AECP Creative Coloring with Erum

Hello! I'm back with more Altenew Educator Certification projects. This time I took Creative Coloring with Erum, a course filled with wonderful techniques and tips! I was especially drawn to the watercoloring tips since it's such a challenge for me but Erum made it so easy to follow along. I'm so excited to show you what I've created.

CARD #1 - Watercoloring and Stencils 

My first card features the Mega Bloom stencil. I started by placing a panel of watercolor paper onto my Stamp Wheel and then positioning the stencil on top. I then blended Dew Drops ink from the Sweet Dream Fresh Dye Ink Set to create a guide.


The Watercolor 36 Pan Set, paint brushes, and clean water are all you need for this next step. I started with a single petal and applied water with my brush, and then ocean waves. I proceeded through each individual petal, allowing them to dry between each one. I decided to add a small amount of Citrus Burst to achieve a subtle glow. 

PRO TIP: Choose a light shade for your guide so it's easy to see but won't result in a color variation.


I added some splatter in matching colors to the panel, then I trimmed it and adhered it to an A2 white card base. I also added blue gems for an added touch of sparkle and interest.


PRO TIP: Add splatters of the same color to tie the look together and create a cohesive design.


CARD #2 - Watercolor Techniques

I used the watercolor splatter technique with the Ambridge Rose set to create this card. I found it to be fun and easy, with great results. 


I started by heat embossing the images onto watercolor paper with white embossing powder. Next, I used my brush and added water wash to the images. I then splattered the Frayed Leaf and Forest Glades from the Watercolor 36 Pan Set onto the leaf images and set them aside to dry. I repeated the same process with the floral image, using Citrus Burst and Warm Sunshine. 

PRO TIP: Dry between layers to make the splatters more prominent


After die-cutting the images, I added additional detail with Prismacolor pencils. I am thrilled with how it turned out.

PRO TIP: To add pencil detail, use a darker pencil than the color of your image for better contrast and definition.


Next, I grabbed another watercolor panel and brushed clean water across it to create a dripping effect. I then applied Caribbean Sky and Ocean Waves for a beautiful watercolor background. I absolutely love this technique!

The sentiment from the Build-A-Flower: Camelia Japonica set was directly stamped onto the panel with black ink. I then popped up the floral image with foam tape and adhered the leaves with liquid adhesive. I adhered the panel to a white A2 card base, and to finish, I added peach sequins for a final touch.


CARD #3 - Adding Marker Details to 
Stamped Images

For my last card, I used the Craft Your Life Project Kit: Dynamic Blossoms.

I started by stamping the image onto white cardstock. I then stamped one of the layering images in Buttercream ink from the Summer Afternoon Fresh Dye Ink Set to create a guide.


PRO TIP: Adding details to layering stamps is a breeze when you have the guide to follow.


Next, I used alcohol markers to add more detail, starting with a darker shade to map out the shadows. 

PRO TIP: Add details to areas without a guide (second layering stamping) to give your project a unique and personalized look.


For the background, I used the splatter technique with black and blue inks for added texture. I then adhered the floral image with foam tape, then adhered it to an A2 white card base. To finish, I added sequins for a bit of sparkle.


What do you think about these techniques? I encourage you to give them a try. They are fun and easy, and the results are worth it.

Well, that's all for today! Thanks for stopping by! Be sure to check back for more creative projects coming soon!


Merry Christmas, Reindeer Style!

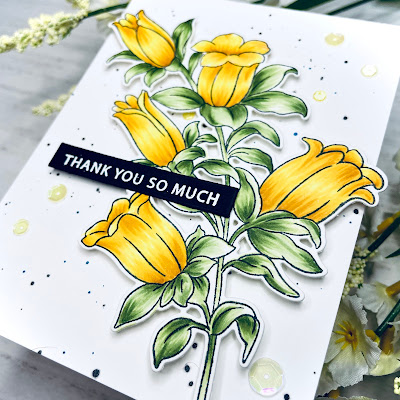
Hi friends! Today, I'm sharing a festive duo, lighting up the night with holiday spirit featuring The Rabbit Hole Designs 1 Line Reindeer Stamp Set.


I began with a panel of white cardstock, placed the Candy Twist Stencil, and secured it with masking tape. I blended Picked Raspberry Distress Oxide ink then cut it with the largest frame from the You've Been Framed Layering Dies. It was then attached to a red card base.


I then stamped the images from the 1 Line Reindeer Stamp Set and colored them with alcohol markers. I fussy cut the images and adhered them to the panel with foam tape for dimension. The sentiment is from the same set and was directly stamped onto the panel with black ink. I finished the card by adding a few red sequins. 


Thank you for stopping by and have a fantastic day!


DISCLOSURE: THIS POST CONTAINS AFFILIATE LINKS, MEANING I GET A SMALL COMMISSION WHEN A PURCHASE IS MADE THROUGH THAT LINK AT NO ADDITIONAL COST TO YOU. THANK YOU FOR SUPPORTING ME SO THAT I MAY CONTINUE TO SHARE MY CREATIONS WITH YOU!


Merry Christmoose Money Card

Hi there, crafty friends! Our challenge was to create a money card, and I was thrilled because the holidays are coming up, and money cards are appreciated in my family. 

I created this moose-themed money card using the Elvis Wesley Moose Themed Paper and Elvis Wesley Moose Themed Sentiments. I used an envelope punchboard to smooth out the corners. Of course, I had to include a moose, so I used the Mistletoe Hello - Elvis Wesley Moose. I added a few snowflakes to complete the card.


Copics used:
Moose: E41-E42-E43-E44-E47
Scarf/Mitten: R00-R02-R05
Shirt: YG00-YG01-YG03-YG23
Boots: C3-C5-C6
Mistletoe: YG61-YG63, R17


CHALLENGES:
Park Hopping My Happy Place - Animal Kingdom Park
Allsorts - #809 AG
Di's Digi Challenge - Use a Digi image


Tuesday, November 26, 2024

AECP Stencils Unleashed

Hello again. I am excited to share that I have just completed my third course in Level 3, Stencils Unleashed. With some extra time on my hands lately, I have been fully immersed in the classes. I'm eager to keep learning and pushing my creativity further.

Nicole Watt's Stencils Unleashed was next-level amazing! She took stenciling to places I didn't know were possible. Thanks to this course, I learned new techniques and redefined what I already knew, combining them into the cards I'm excited to share with you today.

CARD #1 - Graphite Pencil Shading & Creating Silhouettes

I began with a white cardstock panel and placed it on my Stamp Wheel. I then placed the Patchwork Kite Stencil (retired) on top and blended through it with Wisteria and Lavender Fields inks from the Lilac Blossoms Crisp Dye Ink set.


Next, I began shading specific areas of the stencil using the 2H pencil from the Monochrome Shading Pencils set. I alternated between marking the areas with the 2H pencil and shading them with a graphite pencil for added depth and dimension.

After finishing the shading process, I decided to incorporate a technique from another lesson — Creating Silhouettes with a Stencil. 


For this technique, I used a stencil from the Craft Your Life Project Kit: Dynamic Blossoms. I applied an anti-static powder to the panel, then positioned the stencil and secured it with masking tape. I then applied embossing ink to the stencil with a small dabber and heat embossed it with gold embossing powder, adding a beautiful metallic touch.


The sentiment is from Versatile Greetings and was die-cut from gold metallic cardstock for extra sparkle. It was die-cut from gold metallic cardstock for extra sparkle.


CARD #2 - Stencil Stacking

For my next card, I used a technique known as Stencil Stacking. It's a fascinating method that creates a beautifully layered and dynamic effect.

I began with a panel of white cardstock and placed it on my Stamp Wheel. Then, I positioned the Mega Bloom stencil on top and blended Sunny and Chamomile inks from the Golden Sunset Fresh Dye Ink set creating a soft golden glow.


Next, I took the Halftone Stencil and placed it directly on top of the Mega Bloom stencil. I blended Rouge ink from the Red Sunset Fresh Dye Ink set for a beautiful layered effect.


I chose a sentiment from the Dynamic Blossoms set, die-cut it from black cardstock, and adhered it to the panel with liquid adhesive. To complete the card, I added iridescent sequins to give the card a touch of sparkle.


Thank you so much for stopping by! I truly hope you enjoyed my cards and that they've inspired you to try these techniques yourself. I promise, you won't be disappointed.

Have a wonderful day!


CHALLENGES:
SSS Wednesday Challenge - Sparkle & Shine
A Place to Start - Nov Sentiments of Thanks


Sunday, November 24, 2024

AECP Level 3 - Demystifying Mixed Media

Hi friends. I'm thrilled to share that I've just completed another AECP course - Demystifying Mixed Media with Tania Ahmed.

This course was incredibly informative and gave me exactly what I needed, as I have always wanted to explore mixed media. Tania's tips and techniques were so helpful. I have two cards to show today that highlight some of the techniques I picked up from this course.

I have two cards that I would like to share with you today. For the first card, I combined techniques from Lesson 4, Backgrounds, and Lesson 6, Embossing using the Timeless Sentiments Die Complete Bundle and Sweet Flowers Complete Bundle.

CARD #1

I began by cutting out all the sentiments. I then used a panel of white cardstock and a paintbrush to apply gel medium to the panel. I then added the sentiment, followed by another layer of gel medium to secure it. I repeated this process until the entire panel was completely covered. I used a heat tool to speed up the drying process. (Below is a photo of how I set the panel before applying the gel medium).


I applied a layer of gesso using a damp brush. I have again heated it to speed up the drying process.


Tania uses shimmer spray in Lesson 6, but since I don't have that product, I returned to Lesson 4, where she uses the Watercolor 36 Pan Set. Instead, I pulled out my Metallic Watercolor 14 Pan Set to add a beautiful shine to my panel. I used a new brush to apply the gold metallic and then heat set it.

Next, I took embossing ink and lightly tapped it onto the panel. I then heat embossed it with clear embossing powder. Again, Tania used her shimmer spray, but I opted for my metallic watercolor set. I applied some red metallic to the panel and heat set it. (Below you will find a photo of my completed panel).


This simply goes to show that you can still achieve beautiful results, regardless of which medium you choose to work with. It is important to experiment and discover what works best for your project.


For the image, I stamped the outline floral in black ink and used the layering images to color them with the two lightest shades of Blue Mountains Fresh Dye Ink. I repeated this step with the stem, but used the two lightest shades from the Frosted Foliage Fresh Dye Ink set. I then popped the image up on foam tape for dimension.


The sentiment from the Sincere Sentiments Stamp Set was heat embossed on black cardstock using gold embossing powder. I also used foam tape to match the image's dimensions.

I've never created anything like this card before, and I am thrilled with the results! Now, on to my next card, as I am excited to share more with you.


CARD #2

My second card features the Dainty Sprig Stamp and Die Set, showcasing techniques I learned in Lesson 3 of the course, Colored Embossing Paste. It was so fun to experiment with this technique and I love how it adds texture and dimension.


I began by dabbing yellow and orange inks onto my watercolor palette. I then generously spritzed water over the inks to soften and blend the colors. Next, I took a panel of white cardstock and gently pressed it into the water-down ink mixture, letting the colors transfer and blend across the surface. I then dried the panel with my heat tool and repeated the process a few times to build up the color. 

PRO TIP: Drying your panel between each layer helps the colors set and create depth.


I placed the Wavy Grid Stencil on top of my panel and applied embossing paste to my craft sheet. I added a little pink ink to the paste (but probably should have added a little more), mixed it, and applied it through the stencil using a palette knife. After removing the stencil, I sprinkled some gold embossing powder over the paste and heat embossed it. This technique added wonderful texture and a beautiful shine.


Next I worked on the focal image. I stamped it with permanent black ink and colored it using water-based markers then die-cut it with the matching die.

The sentiment is from the Versatile Greetings set. I first colored a piece of white cardstock with a pink marker, then die-cut it out using the matching die. I ran it through the machine again on white cardstock and used liquid adhesive to adhere them together.

I'm really happy with the results and look forward to sharing more projects with you as I continue to explore and refine my creativity! 

Thank you so much for taking the time to visit. Wishing you a delightful day!

Saturday, November 23, 2024

Warm Winter Wishes

Hi friends. I am sharing a holiday card featuring Spellbinders Holiday Blooms Etched Dies from the Celebrate the Season Collection. The florals are set against an embossed background from Simon Says Stamp called Twining Berries


I first started by cutting the dies from white cardstock, then blended several Distress Oxide inks on each piece. For added texture, I embossed another panel of white cardstock with the Twining Berries folder.


Next, I adhered the embossed panel to an A2 white card base using liquid adhesive. I then began assembling the floral bouquet, starting with the poinsettia and then the big flower, which I popped both up on foam tape for added dimension. The remaining pieces were adhered using a liquid adhesive.


The sentiment, from Papertrey Ink's Winter Greetings Stamp Set, was heat embossed in gold, die-cut, and adhered to the card using liquid adhesive. The card was finished with a few gold gems and Wink of Stella to add a touch of sparkle and festive feel.

Thank you for stopping by! Wishing you a wonderful day!

CHALLENGES:
SSS Wednesday Challenge - Sparkle and Shine
Double D - Winter


Friday, November 22, 2024

HOLLYdays are here

Hi friends! I'm excited to share more Christmas inspiration featuring 1 Line Holly Stamp Set from The Rabbit Hole Designs. 


I began by stamping the image in green ink onto a white panel, then coloring it with alcohol markers. I carefully cut only the bottom portion of the holly. I took a pretty plaid panel from the Spring Floral Paper Pack, cut it, and adhered it with foam tape. I then trimmed down some glitter cardstock to add some sparkle.


The sentiment is from the same set and was stamped directly onto the panel in a soft red ink. I added glitter gel to the berries and a few green sequins to finish the card.


Thank you for visiting. Have a HOLLY jolly day!

CHALLENGES:
SSS Wednesday Challenge - Sparkle & Shine
Double D - Winter


DISCLOSURE: THIS POST CONTAINS AFFILIATE LINKS, MEANING I GET A SMALL COMMISSION WHEN A PURCHASE IS MADE THROUGH THAT LINK AT NO ADDITIONAL COST TO YOU. THANK YOU FOR SUPPORTING ME SO THAT I MAY CONTINUE TO SHARE MY CREATIONS WITH YOU!


Lili of the Valley Happy Christmas 2024 Hop

Welcome friends. I am participating in the Lili of the Valley Happy Christmas 2024 hop. Please continue reading to discover how you can enter for a chance to win an amazing prize.


Santa appears to be all wrapped up in holiday cheer, featuring the latest release from Lili of the Valley, Happy Christmas.

I started with a white panel and blended Fire Brick Distress Ink through a brick stencil to create a textured background. Next, I die-cut the panel using a stitched square die and adhered it to a red mat, which was then attached to a white card base.


I printed then colored the images and used my Scan N Cut machine to cut them out. Then, I popped them up on foam tape to add dimension. I placed Santa behind the tree to create the illusion that he was peeking out, adding a playful touch to the scene.

The sentiment, also from Lili of the Valley is called Everything Christmas and was fussy cut and adhered to the panel with liquid glue. I added red sequins around the sentiment for a bit of sparkle and extra festive flair.


We're having a fun Instagram Hop to celebrate Lili of the Valley's Happy Christmas Polymer Stamp Set. It begins at 12PM EST. Find me on Instagram @crafticarri to join the fun and win a gift card to the Lili of the Valley shop.

I hope to see you at the hop, thanks for stopping by.


CHALLENGES:
Creative Knockouts - #535 Tis the Season
Double Trouble - #180 Thing 1
I Spy with My Little Eye - #21 Something for Christmas
Di's Digi Challenge - use Digi image


Thursday, November 21, 2024

AECP Level 3 - Cards in Motion

I'm beyond excited to have made it to Level 3 in the Altenew Educator Certification Program! There are some amazing courses in this level, and I can't wait to share my first Level 3 cards from the Cards in Motion class with Ashley Tucker. It's been such a fun journey, and I'm thrilled to continue learning and growing!

I've got a treat for you today! I couldn't stop making them, so I've created 3 amazing interactive cards to share with you. This is going to be a longer post, so consider this your warning! But if you stick with me until the end, I promise you'll walk away with some new fun techniques. I hope you'll follow along!


SHAKER CARD

My first card is from the Shaker Cards course. This course was truly enjoyable, and it turned out to be easier than I thought it would be.


I began by stamping the Mini Crepe Cake on white cardstock. I used Copic Markers to color it and then cut it out with a circle die and set aside to work on creating my shaker window.

I then cut out a circle frame and a piece of acetate, then adhered them together with liquid adhesive. After that, I added foam tape and carefully positioned it onto the image panel, placing my shaker elements in the center.

PRO TIP: Place scrap paper under the acetate, then add your die and run it through your machine for easier cutting.


Next, I adhered the shaker piece to a white panel, ensuring that it was perfectly aligned, and then adhered it onto a red card base for a bold pop of color. To finish the card, I stamped and the sentiment in black ink, placing git right in the center beneath the shaker window for a balanced eye-catching design. 

I'm really happy with how this card turned out, and I can't wait to make more shaker cards in the near future!


POP-UP CARD #1

Now for my next two cards, I'm excited to showcase two distinct styles of pop-up cards. Each one brings it's own unique design and surprise element. Let's get started and explore these creative cards. 

I used Lesson 6 from the Twist Pop-Up Cards course featuring the Smile More (retired) and Midnight Moth stamp sets.


To begin, I took a piece of white cardstock and cut it down to 10 x 2 1/2 inches. Then, I scored it at 5. I then rotated it and scored it again at 1 1/4. I folded down the right side to align the score lines, and then used my bone folder to crease it firmly. I then flipped it over and did the same thing on the other side.

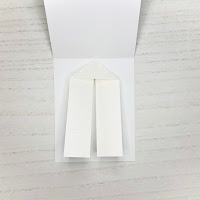
Next, I used an A2 panel and a ruler to mark the center of the folded-sided area. I then marked it with a pencil. I then adhered double-sided sticky tape to the triangle section of the pop-up mechanism on both sides. I removed the sticky tape from one side of the pop-up mechanism, placed it into the card base, and then pressed down firmly to secure it. The sticky tape was removed from the other side and pressed into place.


I then stamped the images, colored them with Copic Markers and then cut them out with a stitched square die. I cut a slightly larger square, rounded the corners, and then adhered them together with liquid adhesive.

Next, I cut a piece of yellow cardstock and cut it down to 10 x 2 1/2, just like the pop-up mechanism. This time, I scored it at 5", then 2 1/2 on both sides. I then folded it in half, then folded one side, flipped it over, and folded the other side, resulting in an accordion fold. I then rounded the corners and adhered the images to it with liquid adhesive. I then attached it to the pop-up mechanism, creating a fun pop-up card.  


I stamped the largest floral image and one leaf twice, one on cardstock and one on a post-it note, to create a mask. The images were colored with Copic markers and fussy cut out. After that, I adhered the image to the panel using liquid adhesive. 

The sentiment is from the Charming Delight Stencil Set and was blended with black ink, die-cut with the matching die, and then popped up on foam tape. I completed the card by adding yellow sequins.


POP-UP CARD #2

The final pop-up card I will share is from Lesson 3, and it is actually my favorite. I used the Midnight Moth Stamp Set once again. I can't wait for you to see it!

I began with a panel of Neenah Classic Crest #80 and marked the center with a ruler at 2 1/8 with a pencil near the folded area. I then marked 1" on both sides of the center mark and used my T-ruler to draw a line 1 1/4" from each mark. I used a fine point blade to cut along the pencil lines in order to create the pop-up mechanism for my card. Next, I cut a 1/4 off all sides and adhered it to an A2 white card base using liquid adhesive.

PRO TIP: You can use scissors for the cuts, but you will get a cleaner result with a fine point blade. Just be careful to exercise caution when using a blade for safety.


Next, I stamped the image and colored it with Copic markers. I fussy cut it out, but there are matching dies available. After stamping the sentiment in black ink onto the top portion of the panel, I adhered the image to the pop-up mechanism.


I am now ready to begin working on the front of the card. I took a panel of white cardstock and cut it to 4 x 5 1/4. I then stamped the images in a soft pink shade. I also dabbed some purple ink along the edges of the image for added dimension. After stamping the sentiment in black ink, I adhered the panel to a pink mat (4 x 5 3/8) and attached it to an A2 white card base.


Well, that's a wrap! I hope you enjoyed my cards and that they've inspired you to try these fun techniques yourself.

Thank you very much for visiting and for following along with my Altenew crafting journey. I appreciate your support and can't wait to share more creative ideas with you soon!


CHALLENGES:
Double Trouble - #180 Thing 1
Sweet Stampin - It's our Birthday