DISCLOSURE:

Several affiliate links are used in my posts. This means that, if you click on one of my links and make a purchase from that company, I will receive a small percentage of the sale without any additional charge. I appreciate your support greatly.

Thursday, June 19, 2025

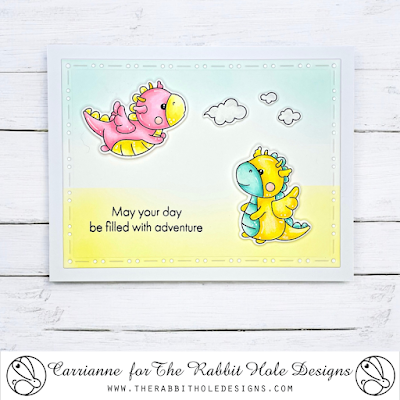
Happy Birthday featuring The Rabbit Hole Designs Dragon Fun and Sentimentally Speaking Bundle

Hey friends! I’ve got a fun birthday card to share today featuring the Sentimentally Speaking Bundle and paired it with the Dragon Fun Bundle from The Rabbit Hole Designs. 


I started by stamping the adorable dragon from the Dragon Fun Bundle and coloring it with alcohol markers. Once colored, I used the matching die to cut it out.

Next, I pulled out some fun patterned paper from the Spring Floral Paper Pack. I die cut the polka dot paper with a stitched circle and trimmed the pastel rainbow paper to 2" x 4.25", then adhered both pieces to the card panel.

I added the dragon right in the center of the stitched circle using foam tape to give it some dimension. For the sentiment, I stamped and die cut it, then separated it into two words and layered them on top of each other with foam tape to finish the design.


Thanks for stopping by—hope your day is dragon on in the best way! 


Altenew Craft-A-Flower: Cistus Layering Die Set

Hi friends! Today I’m sharing a card featuring the Craft-A-Flower: Cistus Layering Die Set from Altenew. I recently added this gorgeous set to my stash and couldn’t wait to dive in! 

I began by die-cutting the Cistus flowers from a mix of yellow, orange, and burnt orange cardstock, layering the pieces together with liquid adhesive to create rich, dimensional blooms. For the leaves, I used varying shades of green cardstock to add depth and contrast, adhering them in the same way.


To build the background, I took a panel of white cardstock and placed the Color Block Triangle Stencil over it. Using a blending brush, I softly applied Vanilla Cream ink from the Delectable Delights Fresh Dye Ink Set through the stencil. The subtle pattern added just the right amount of interest and warmth to support the floral arrangement without overwhelming it.

I arranged the layered flowers and leaves into a balanced cluster, letting the soft Vanilla Cream background subtly peek through and add gentle interest behind the bold florals. The triangle pattern gave just the right modern touch without competing with the organic shapes. I then adhered the entire stenciled panel to a white card base.


The sentiment is from the Seasonal Blooms Set. I cut the shadow layer from black cardstock and the main sentiment layer from white cardstock, then carefully adhered them together with liquid glue to create a clean, crisp, and dimensional look.

To finish the card, I added several black enamel dots around the floral cluster and near the sentiment. These small accents added a subtle pop of texture and visual interest, while perfectly tying in with the black shadow layer of the sentiment for a cohesive, polished look.


Thank you so much for stopping by! I hope this card brightens your day and sparks some creativity. Happy crafting!


CHALLENGES:


Allsorts - #825 *Flowers make me happy 
A Cut Above - June AG
As You Like it Challenge - Add sentiment is a favorite as it gives meaning


Affiliate Disclosure:
This post contains affiliate links, which means if you make a purchase through these links, I may earn a small commission at no extra cost to you. I only recommend products I truly love and use. Your support is greatly appreciated and helps me keep creating content for you!


Tuesday, June 17, 2025

Making Waves with La-La Land Crafts June Kit of the Month

Make a splash with the June Kit of the Month from La-La Land Crafts—a seaside-inspired collection full of summer charm! This exclusive kit features Seaside Marci, a classic lighthousewavessea birds, and the super fun Gulp Gulp Clear Stamp Set to bring a touch of whimsy and humor to your projects.


Additional Products:
Color Me Happy Paper Pack
Mountains Layering Stencil Set
Window Die
Scalloped Sentiment Labels Die

Copic Markers:
Skin: E00-E02-E11
Hair: Y11-Y21-E15-E18
Romper: R00-R02-R05
Cover-Up/Sandals: Co-C2-C4-C6


Not a subscriber yet? Now’s the perfect time to join! Don’t miss your chance to add this wave-making kit to your collection. Visit La-La Land Crafts for subscription info and more inspiration!

CHALLENGES:
As You Like It Challenge - Always add Sentiment as it brings meaning


Sunday, June 15, 2025

Beautiful Blossoms Challenge #30

Hi there, friends! We’re back with a brand new challenge at Beautiful Blossoms Challenge Blog, and as always, it’s Anything Floral Goes! For extra inspiration, there’s an optional mood board available. I can't wait to see all your gorgeous creations! Happy crafting!

Today I’m sharing my final card as a member of the design team and while it’s always tough to say goodbye, this decision comes from a place of love and necessity.

Due to recent changes in my family life, especially my father's health, I’ve decided to step down from a few of my design team roles to make more space for family time.

That said, I couldn't leave without sharing one more project — a card that I hope brings a little light and inspiration your way.

Thank you to Donna and my wonderful teammates! I’ve truly appreciated being part of this inspiring team.


For my final card, I decided to keep things clean and simple, both in design and sentiment — a quiet reflection of where I am right now.

I used the beautiful Altenew Hill Blossoms Layering Stencil Set to create soft, elegant florals that feel peaceful and uplifting. I blended Golden Sunset and Frosted Foliage Fresh Dye Inks through the layers, keeping the palette light and calming — a gentle contrast that felt just right for this moment.

The sentiment, “Just Believe in Yourself,” felt especially meaningful — not only for the card’s message, but as something I’ve been reminding myself of lately. Stepping away from this team to focus more on my family hasn’t been easy, but I know it’s the right choice.

Thanks so much for stopping by today. Your support and encouragement have meant more to me than I can say.

Though I’m stepping down from this team, I’m looking forward to continuing to share my creative journey in a way that feels more balanced and intentional.

Until next time — happy crafting!

CHALLENGES:
Allsorts - #825 Flowers
We Love Stamping - June *Nature
As You Like It - June *Add a sentiment - to convey feelings and would feel incomplete


Affiliate Disclosure:
This post contains affiliate links, which means if you make a purchase through these links, I may earn a small commission at no extra cost to you. I only recommend products I truly love and use. Your support is greatly appreciated and helps me keep creating content for you!


Wednesday, June 11, 2025

Make Waves with the June Kit of the Month from La-La Land Crafts

Hello crafty friends!

I'm so excited to share two cards featuring the June Kit of the Month from La-La Land Crafts and they are shore to make you smile!

This month’s kit is bursting with coastal inspiration, featuring Seaside Marci, the Gulp Gulp Clear Stamp Set, and a collection of dies — including a Lighthouse, two Waves, and a whole flock of Seagulls ready to soar across your crafty skies.


My first card is full of seaside charm, featuring the Gulp Gulp Clear Stamp Set alongside the Lighthouse, Waves, and Seagulls dies. The background was created using patterned paper from the Summer Vacation Paper Pack, which adds the perfect breezy feel. I framed the scene by cutting the background with the Scalloped Rectangles Die for a polished, finished look.


This card features Seaside Marci by the shore, with the Lighthouse, layered Waves, and a flock of seagulls completing the coastal scene. The background was created using a mix of papers from the Color Me Happy and Spring Has Sprung packs, adding a bright and breezy feel to this cheerful seaside design. The sentiment was stamped and framed using the Scalloped Sentiment Labels Die for a clean, polished finish.

CHALLENGES:


Sunday, June 8, 2025

TRHD Caffeinated Critters - Flamingo Style!

Hi crafty friends! Today I’m sharing a fun and fabulous card featuring one of my favorite critters from the Caffeinated Critters Set by The Rabbit Hole Designs. And who better to represent peak caffeine sass than the flamingo

She’s pretty in pink, slightly frazzled, and definitely in need of her next coffee fix—just like most of us before 9am!


I started by stamping the image on white cardstock, then colored it using alcohol markers. Once the coloring was complete, I used the coordinating die to cut out the image cleanly and precisely.

Next, I cut a panel using the You've Been Framed Layering Die and adhered it to a light pink mat. This was then mounted onto a darker shade of pink card base for a soft, monochromatic look. Before assembling the rest, I added some pink ink splatter to the panel for a touch of texture and playful energy. 

To coordinate the design, I used the sentiment strip dies from the same set in both pink tones and placed them along the right side of the card for a layered effect.

I popped the flamingo above the sentiment strips using foam tape to give her some fun dimension and center-stage attention. For the sentiment, I stamped it, die cut it with the same strip die, and blended a touch of pink ink to tie everything together. It was then adhered to the top of the panel as a finishing touch.


This set is such a blast to create with—every critter has its own personality, and the flamingo’s sleepy sass was just begging for some bright pink vibes.

Thank you so much for stopping by! Wishing you a wonderful day filled with creativity and joy!

Want to recreate this card? Shop the products using my Affiliate Link and enjoy a discount! 

CHALLENGES:
Park Hopping My Happy Place - Kilimanjaro Safari
Allsorts - #825 Coffee makes me happy and pink flamingos 


Several affiliate links are used in my posts. This means that, if you click on one of my links and make a purchase from that company, I will receive a small percentage of the sale without any additional charge. I appreciate your support greatly.


Wednesday, June 4, 2025

The Paper Funday Challenge June 2025 - DT Card

Welcome back to The Paper Funday Challenge! We’re so excited to have you join us for another month of crafty fun and fresh inspiration. This month’s challenge is generously sponsored by Pink & Main and Dare 2B Artsy! The theme is Anything Goes, but we’ve got a fun twist to get your creative wheels turning: Embossing – Wet or Dry! 

For my project, I used the Pink & Main Big Hugs Die as the focal point — I love how it makes a bold, heartfelt statement. I also had fun playing along with the embossing twist this month and added some dry embossing to give my background a little extra dimension. 


I created this pet sympathy card by cutting the “HUGS” die from soft pink cardstock and layering it over a black shadow. The background is dry embossed with a paw print folder on pink cardstock, then mounted on a black card base. 

I used sentiments from Unity’s Loved by a Dog—the main one stamped on a pink strip and layered over black, and a heat-embossed sub-sentiment placed just above the HUGS. A simple, heartfelt way to send comfort after the loss of a beloved pet.

Thank you so much for stopping by! Wishing you a wonderful day filled with creativity and joy!

CHALLENGES:
Crafty Calendar Challenge - June *Add a Sentiment
A Cut Above - June AG
Stamping Sensations - June AG *Our Furry Friends
As You Like It Challenge - Dry Embossing, I love the added texture


Monday, June 2, 2025

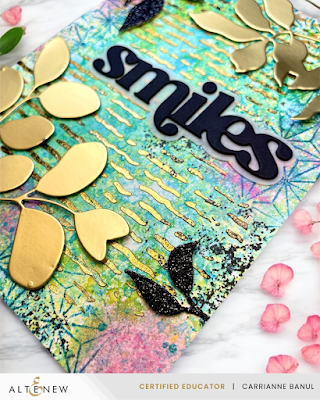
FREE Mixed Media Magic Workshop - Create a Card that Shines

Welcome and thank you for signing up for my Mixed Media Magic - Create a Card that Shines Workshop! I am so excited to have you join me today to explore the wonderful world of mixed media. 

Mixed Media Magic - Create a Card that Shines

Instructor: Carrianne Banul
Date: July 2, 2025
Time6:00 PM (EST)
PlatformZoom


Get ready to dive into texture, color, and shine! In this workshop, we’ll create a mixed media card using shimmer sprays, inks, and shimmer paste. You’ll learn fun techniques for building layered backgrounds, adding depth with stencils, and giving your cards a bold, artistic feel.

Whether you're new to mixed media or looking to expand your skills, this class is packed with inspiration and hands-on techniques to spark your creativity. You’ll leave with a card full of movement, shimmer, and personality—plus, the confidence to try these methods on your own!

Altenew Supplies (with substitutions):

Craft-A-Flower: Zinnia Layering Die Set
Pinstripe Stamp Set (substitution)
Watercolor Paper Set (A2 Loose Sheets)

Other Supplies:
Water Spray Bottle
Black ink (I used Versafine)
Splatter Box

I’d greatly appreciate it if you would use my Altenew Affiliate Link for your purchases SHOP HERE. It comes at no extra cost to you, but it helps support future workshops and my crafting journey. Thank you so much for your support! 

If you haven’t received the discount code after signing up for the workshop, please feel free to reach out to me, and I’ll be happy to provide it!

If you have any questions or would like to register for this class, don’t hesitate to reach out to me via email at carrianne23@gmail.com. I’m more than happy to assist you and will be here to guide you through every step of the process. 

Remember, no question is too small or silly — we’re all here to learn and grow together, and I want to make sure you're comfortable and ready for the class!


Affiliate Disclosure:
This post contains affiliate links, which means if you make a purchase through these links, I may earn a small commission at no extra cost to you. I only recommend products I truly love and use. Your support is greatly appreciated and helps me keep creating content for you!